A name tag
You will make a keyring name tag: a small plate with rounded corners, a hole for the ring and your name raised off the top. You need no CAD experience, and it takes about 20 minutes.
The letters are a sketch text, drawn on the plate's top face, and Emboss lifts them out of the face so they stand as part of the same solid. Everything is driven by named numbers, so you change the name's length later by editing one value.
Open the app at https://app.extrudo.org.
1. Start a design and add your numbers
On the home screen press New design. Press the name at the top, type
Name tag and press Enter. Then open the Home tab and press
Parameters.
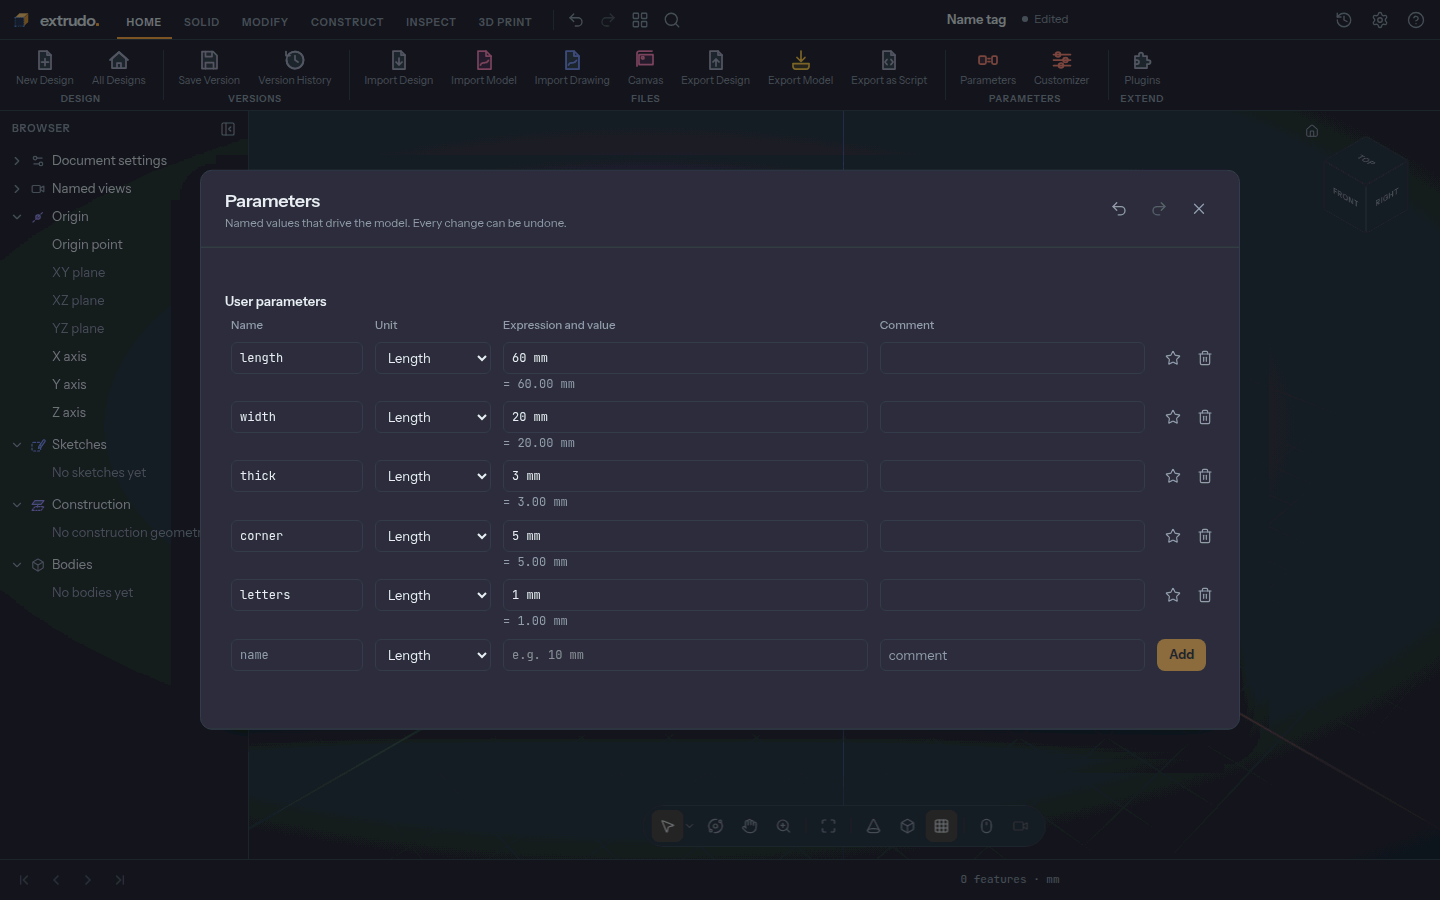
In the row at the bottom type a name, leave the unit on Length, type an expression and press Add. Add these five:
| Name | Expression |
|---|---|
length |
60 mm |
width |
20 mm |
thick |
3 mm |
corner |
5 mm |
letters |
1 mm |
The plate is length × width and thick tall, the corners are rounded by
corner, and the letters stand letters proud of the top. Press Esc to close
the dialog.
2. Draw the plate with the Box tool
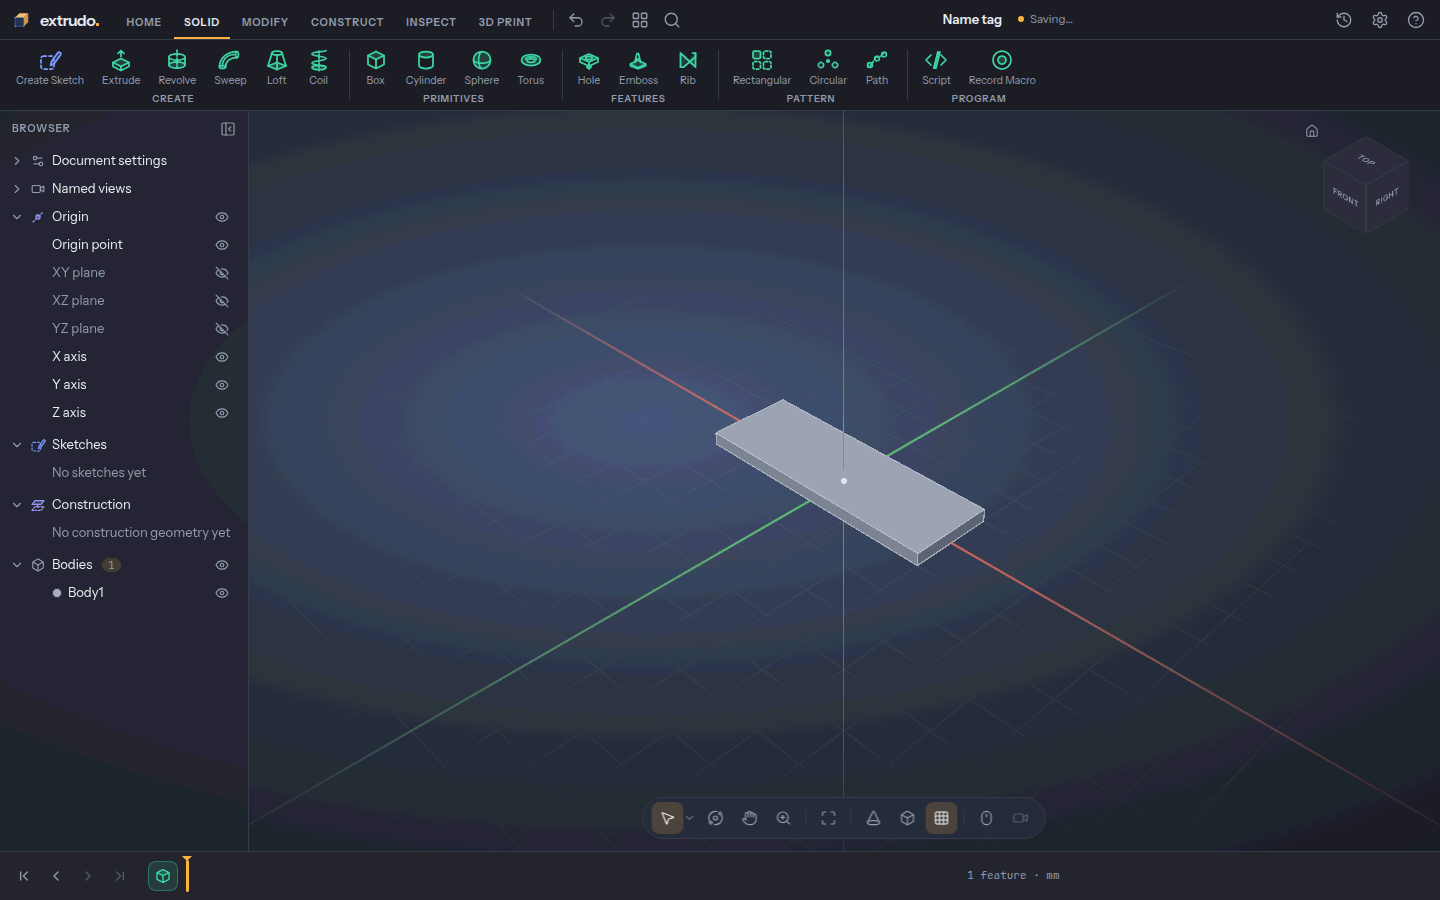
Open the Solid tab and press Box. Leave Plane on XY, the floor of
the model. Set Length to length, Width to width and Height to
thick. Press OK.
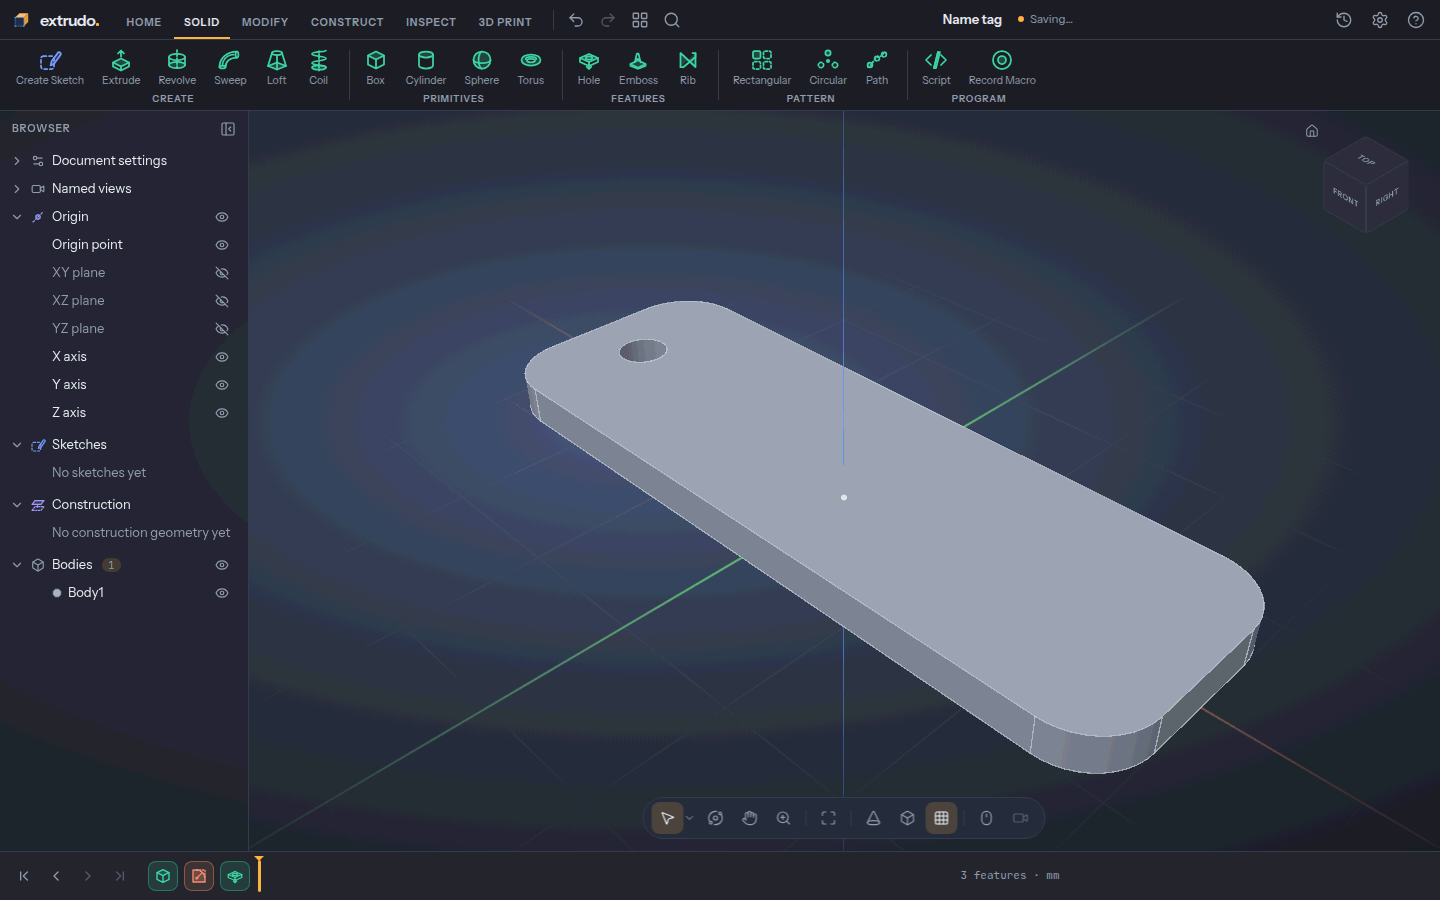
You now have a solid plate, Body1, 60 × 20 × 3 mm with six faces.
3. Round three corners
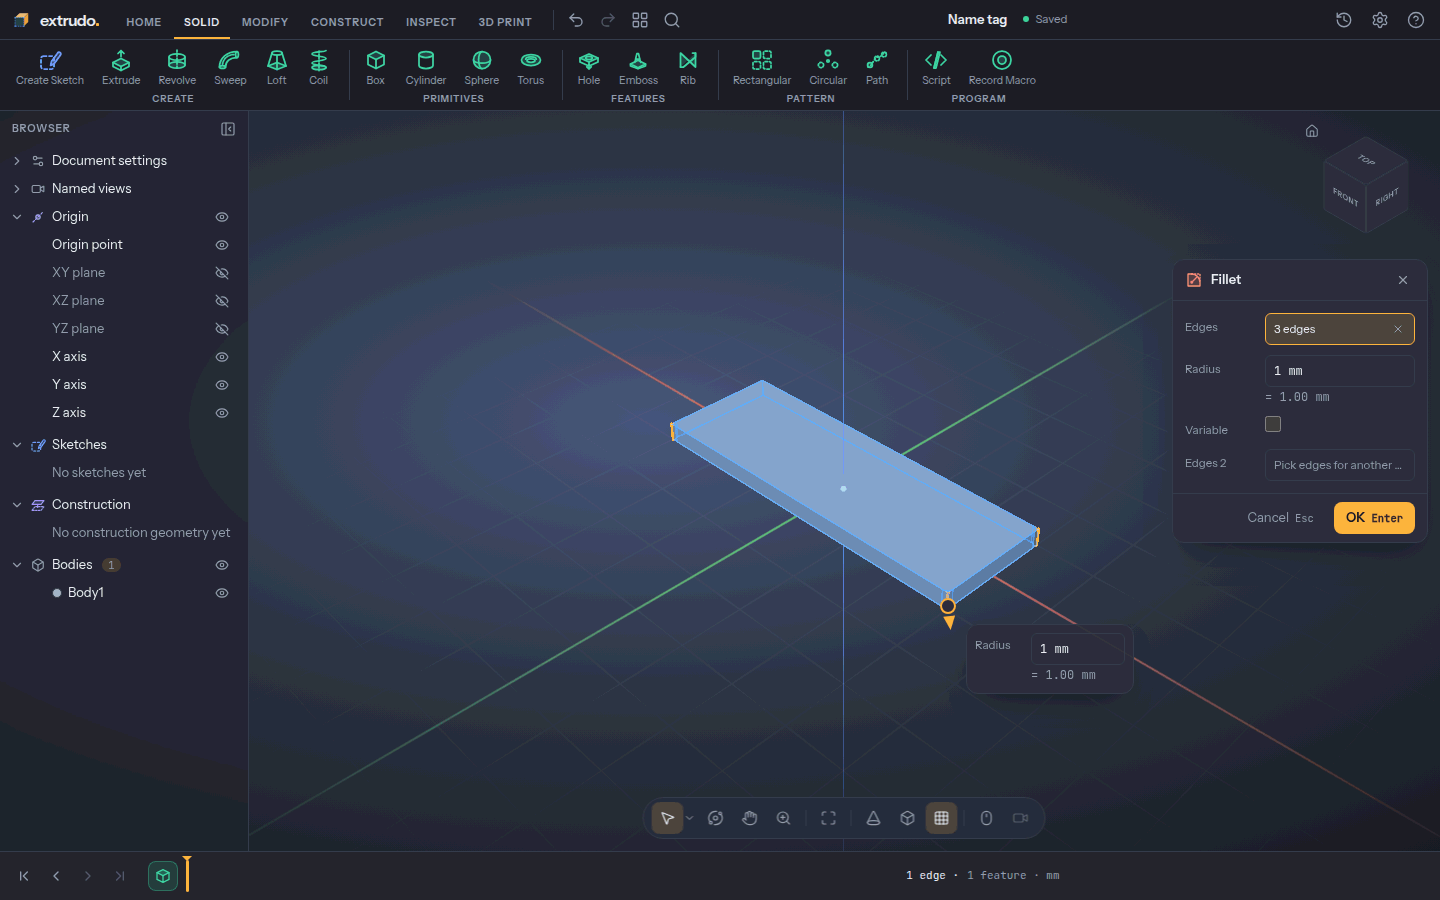
Press Shift+1 for the home view. Press F (Fillet). Hover the plate's
near vertical corner edge until it lights up and click it; the Fillet dialog
opens with 1 edge.
Scroll to zoom out a little so the corners clear the dialog, then click the other two vertical corner edges you can see. The dialog now says 3 edges.
4. Bring in the hidden corner
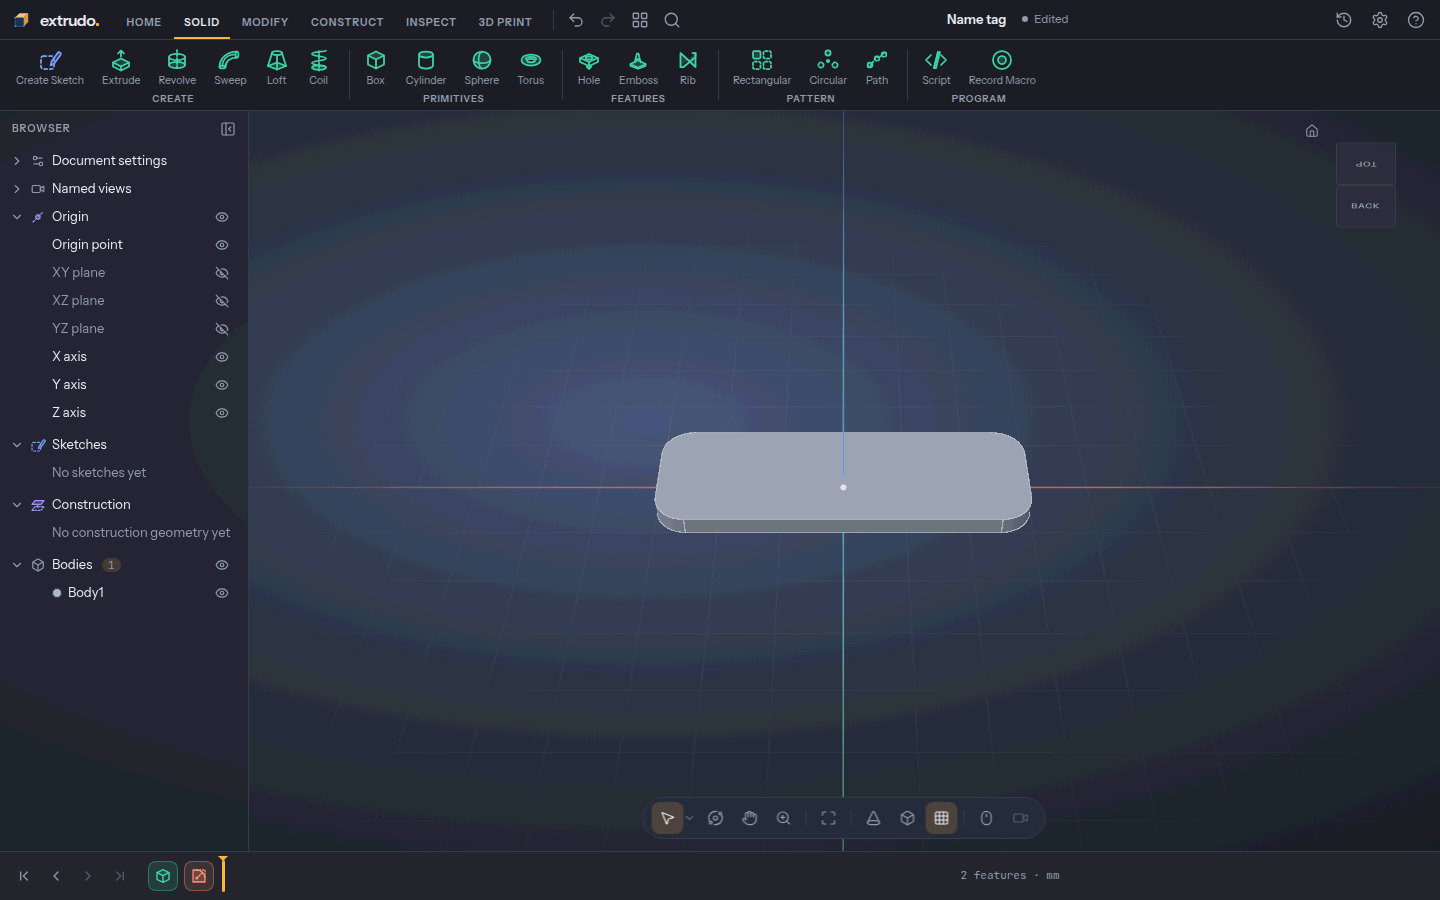
One corner faces away from you in the home view. Press Shift+5 to look from
the back, zoom out, tip the view down a little by dragging with the middle mouse button, and click that last vertical edge. The dialog reads
4 edges.
Type corner in Radius and press OK. All four corners are now rounded,
and the top and bottom faces are whole again.
5. Drill the key-ring hole
Press Shift+1. Press H (Hole). The dialog opens on the XY plane.
Click the plate's top face near its left end: the click picks the face and places
the hole where it landed.
Set X to -length / 2 + 6 mm, Y to 0 mm, Diameter to 4 mm and
Extent to Through, then press OK. The hole is 6 mm in from the left
end, ready for a keyring.
6. Sketch on the top face
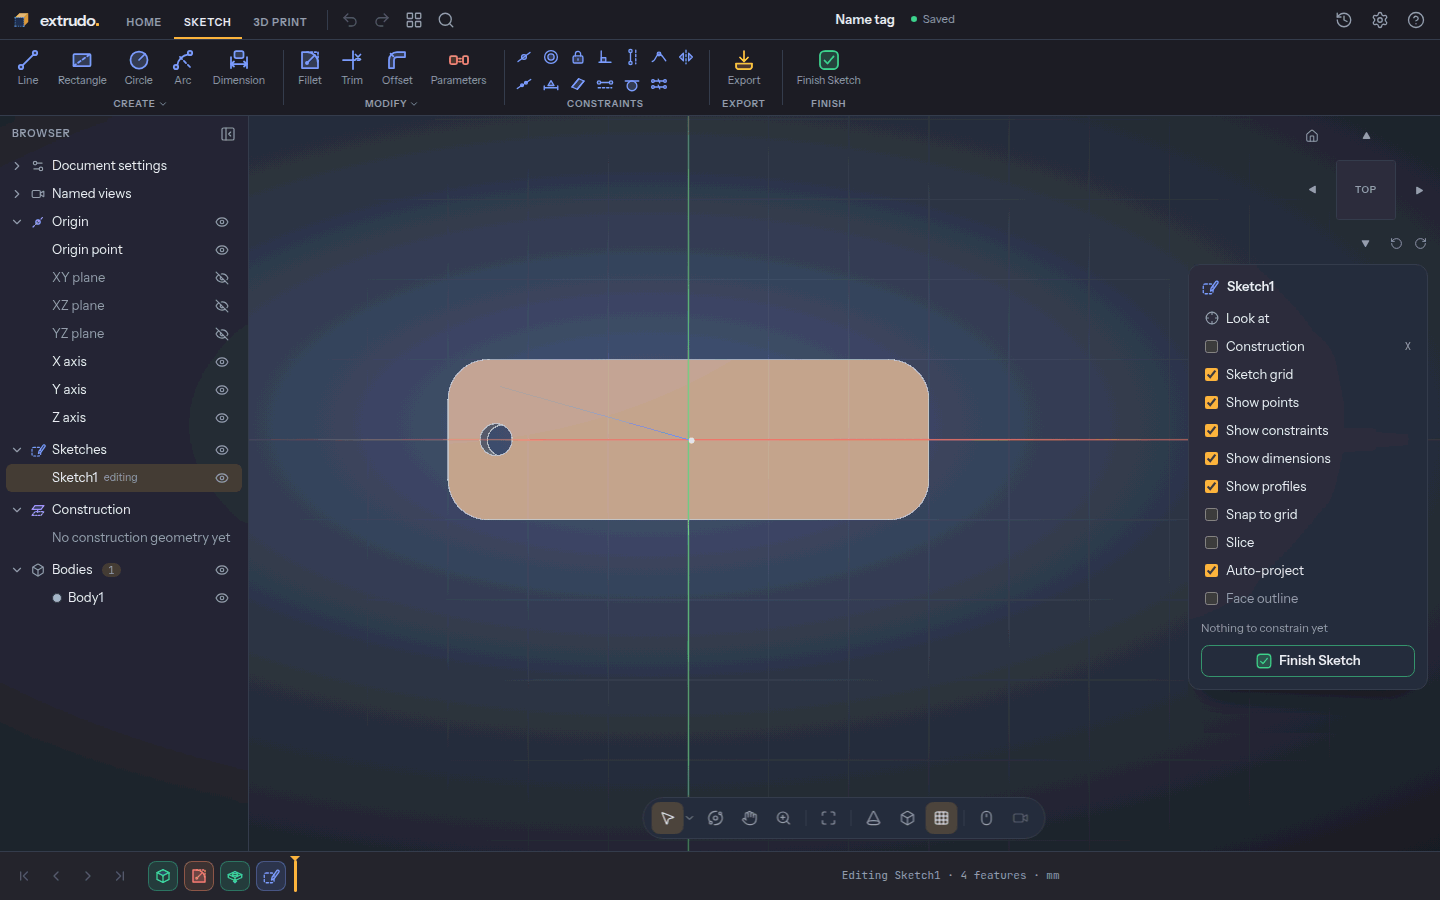
Press Create Sketch and click the top face in the middle of the right half. The view turns to look straight down on it, and a new sketch starts on the face.
In the Sketch palette on the right, switch Snap to grid off: the letters go exactly where you put them, not on the grid. Turn Show profiles on so a click inside a letter takes the whole text later.
Scroll out and drag with the right mouse button until the whole tag sits in the middle, clear of the palette and the Text panel that comes next.
7. Type the name
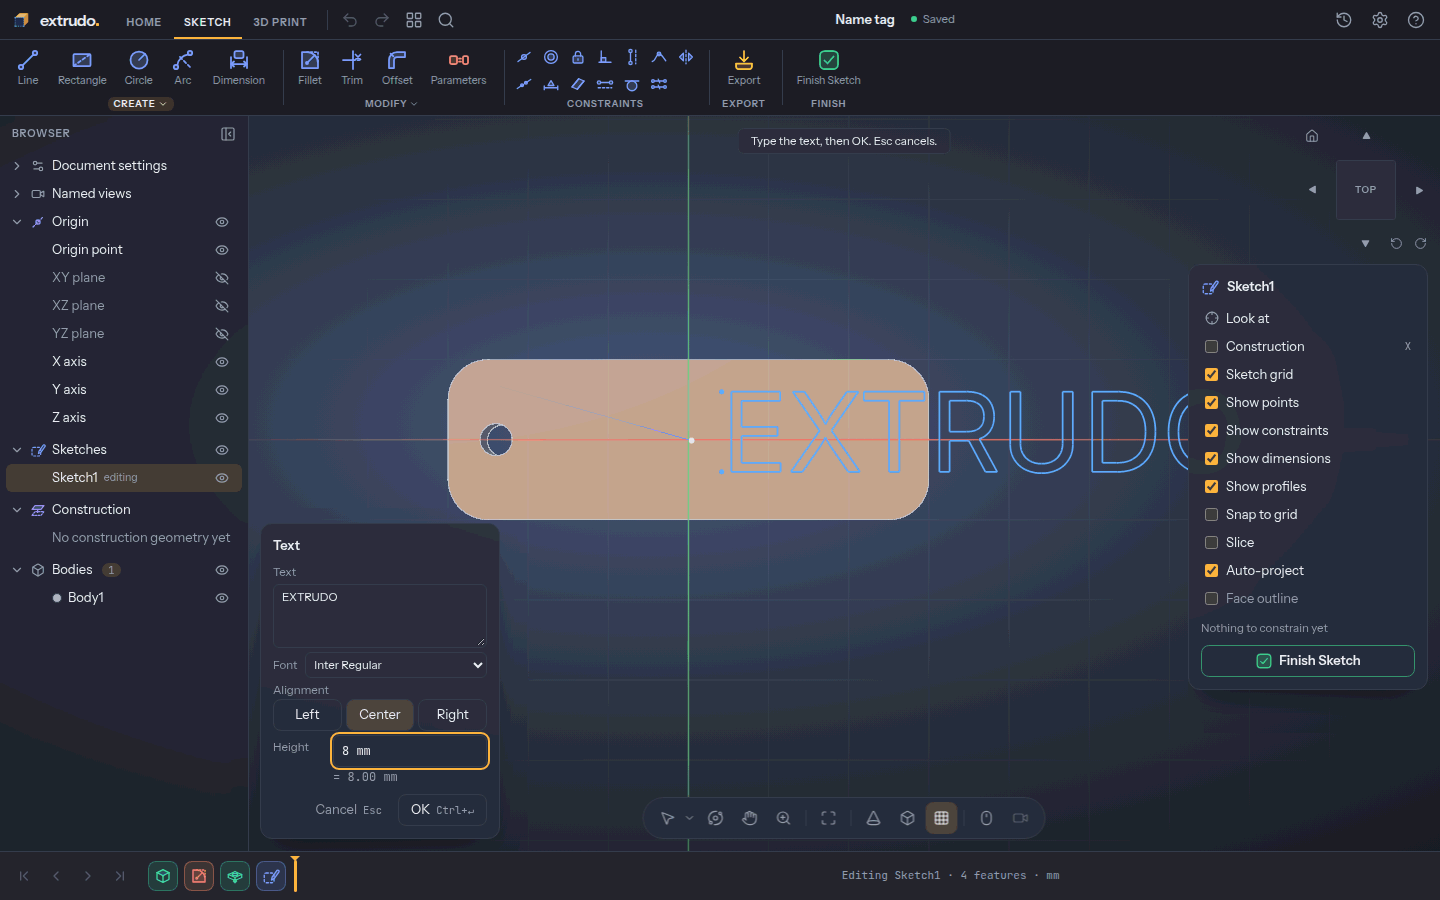
Press Shift+T (Text), then click where the first line's baseline starts, a
little left of centre at x = 4 mm. The Text panel opens.
Type EXTRUDO, press Center, and set Height to 8 mm. The letters
appear on the plate. An 8 mm cap height makes EXTRUDO about 51 mm wide; centred
on x = 4 mm it sits between the hole and the far end.
8. Finish the sketch
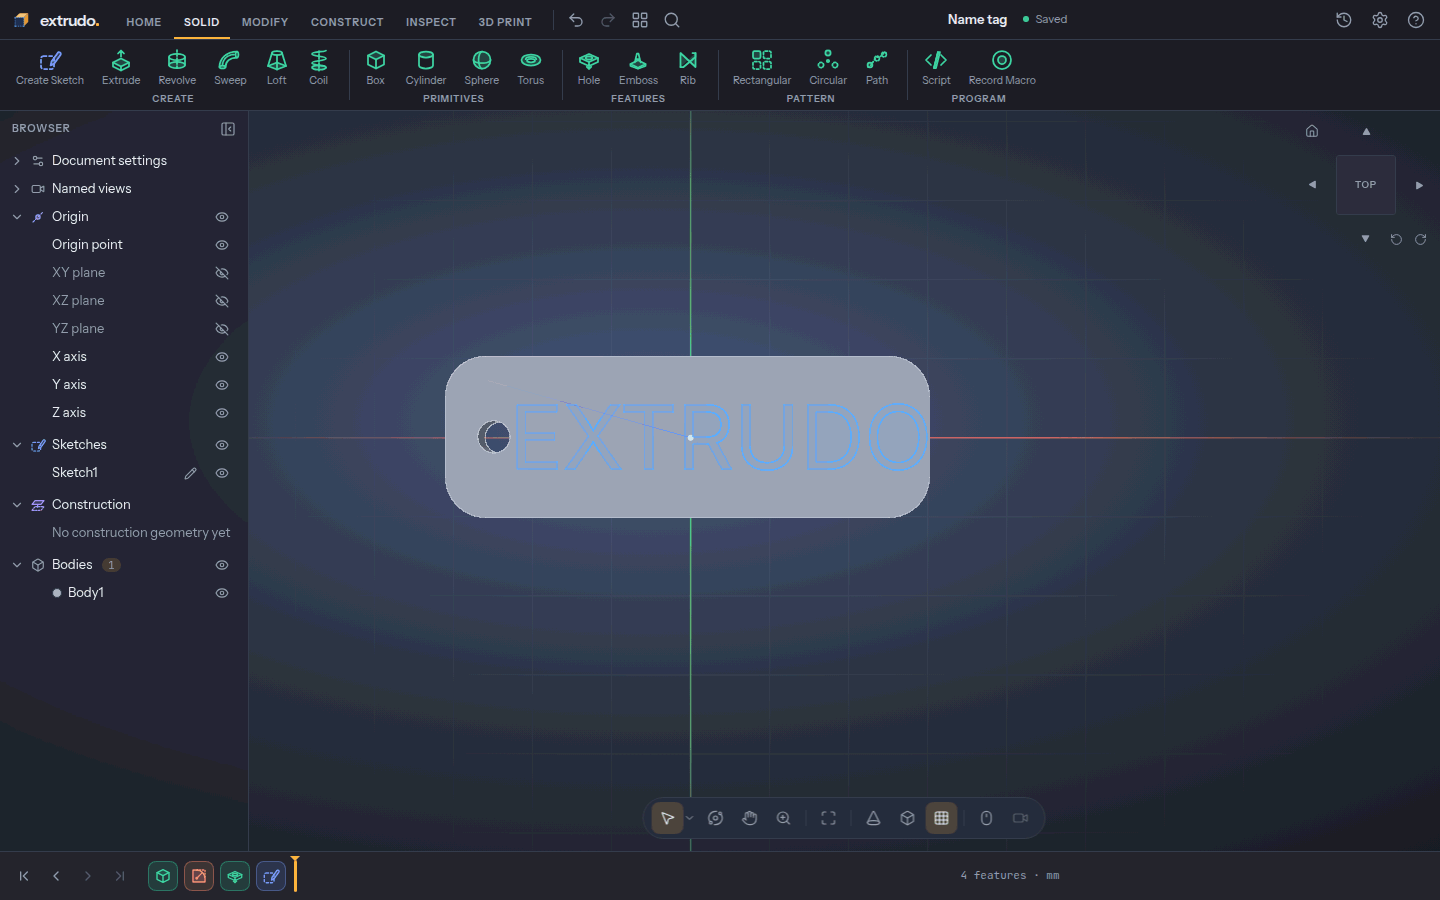
Press OK in the Text panel, then Esc to leave the tool. Press Finish
Sketch. The sketch joins the timeline at the bottom as Sketch1.
9. Raise the letters
Press Shift+1. Click a letter in the model: the whole text is selected at once.
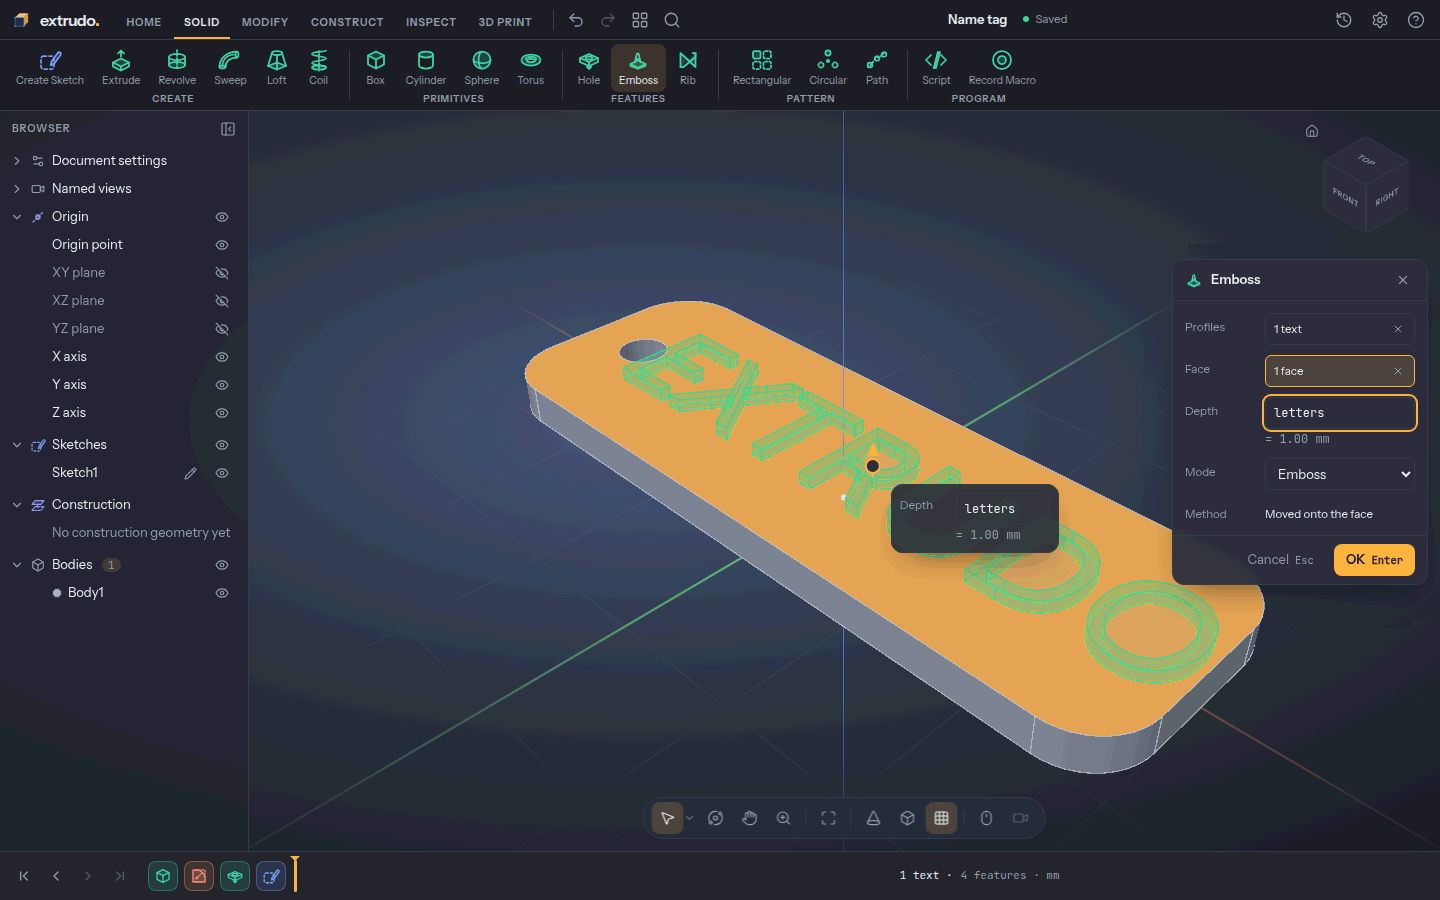
Run Emboss in the Solid tab's Features group.
The Profiles field reads 1 text. Click the top face clear of the letters
and the hole so Face reads 1 face. Set Depth to letters and press
OK. The letters rise off the plate.
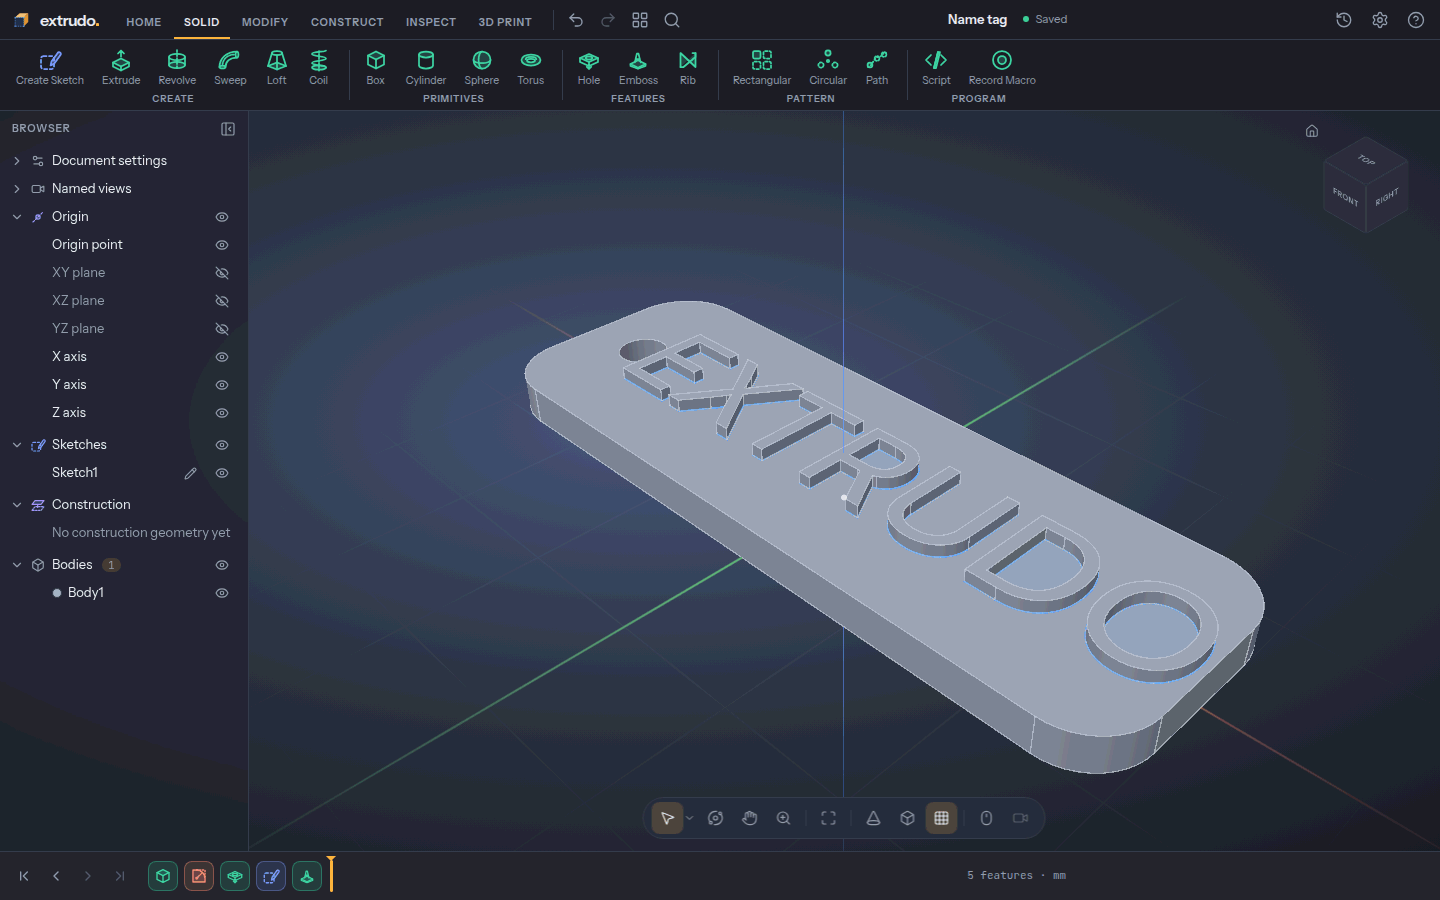
10. The name tag
The plate is still one body, Body1. The letters stand on it rather than
floating beside it, so it prints as a single piece. It is 60 × 20 mm and 4 mm
tall: 3 mm of plate plus 1 mm of letters.
11. Export for printing
Open the 3D Print tab and press Export. Choose 3MF. The summary says the model is watertight, which means a slicer can read it without repair. Press Export 3MF and the file downloads.

What you learned
- Sketch text gives you real letters as sketch geometry you can shape and place.
- Emboss raises a sketch's profiles or text out of a face, so the letters become part of the same solid as the plate.
- A fillet rounds edges; on a thin plate one corner can hide from a view, and turning the view brings it back.
- A hole through the plate leaves room for a keyring.
- 3MF is a print-ready export your slicer reads.
Related tools: Text, Emboss, Fillet, Hole, Box, Parameters and Export. New to Extrudo? Start with Your first part, or read the guide.